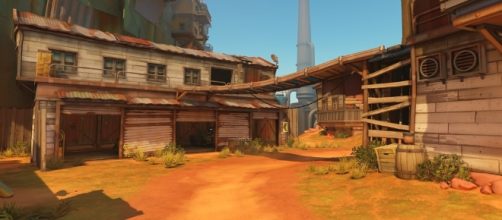
Junkertown was released in September and it wasn't immediately available in competitive play. Considering the escort map hasn't been out for even two months, a lot of players still have trouble adjusting to it and applying the right strategy in order to win. Arguably, defending team has a slight advantage on this map, but that doesn't mean that it's easy to stop the other team.
This "Overwatch" map has three stages and it is important for players to learn every part of the map in order to successfully win the game. In this guide, you can read some very useful tips that will help you become a better defender in Junkertown.
Starting area
General rule is to always take the High Ground and eliminate targets that are on the ground or out of position. Now only will you have a great position to take your enemies down, but you will also be provided with a lot of cover you can use to avoid incoming attacks.
It is important to not engage enemies on the first bridge (red X) as there's a lot of open space. However, you can hide in the house left of the bridge which will allow you to surprise flankers and eliminate them.
You have to Stay Alive and defend the point, even if it means letting the attacking team push the payload for a few seconds. Do not engage the enemy teams in the open field as it can easily lead to your death, which means you will have a long way to go before you get back to the point.
Preferably, defenders should have hitscan heroes such Soldier: 76, McCree or Windowmaker, but Junkrat and Torbjorn will do a good job as well.
First checkpoint
If defenders lose the first choke points and allow their enemies to push the payload, they will have to retreat to Junkertown. The first checkpoint is located in the open field where it will be extremely difficult to stop the attacking team and prevent their push.
Heroes with low mobility and ranged heroes, such as Ana, Zenyatta or McCree, should position themselves over the city's sign. They will be able to deal damage to their enemies from this spot and to postpone their push. However, mobile heroes should utilize the house next to Junkertown, but they should fall back to the blue region if they start to lose their position.
Second choke point
Defensive team should move to the bridge and defend from there as it gives them a great position to take enemies down. Staying alive is essential as the walk from the spawn room is too long and could be too costly for the team.
Heroes with high-burst damage should move to the ledge shown in the picture above as it will allow them to get some easy and quick kills. This will force attackers to respawn which will significantly delay their progress towards the objective. However, if you decide to use this strategy, make sure you don't stay on the ledge for too long as the enemy team will notice you and take you down.
Second point
Hold off attackers that come from the second floor (blue) and make sure you don't get eliminated by flankers, as there will be many of them at this stage.
Once again, it is essential to stay alive, but if you die, do not come out from the doorway (red X) as it allows the enemy team easy camping.
Final stage
While taking the high ground is a good choice at the final stage, defending team cannot go wrong by defending on the ground as well. The first choke point of the final stage is quite difficult for the attackers because the entrances are narrow. Set up the defense, get your tanks to provide the cover and hold your position for as long as you can.
It's a good idea to have Torbjorn on the team as he can place his turrets next to his teammates in the green area.
Torbjorn can also place his turrets on the left ledge. This ledge is also a great spot for Junkrat who can deal massive damage from it and he can also keep flankers away from it.
It is also a good idea to attack the attacking team from different angles, so if Junkrat is on the left ledge, have another hero on the right side, which is a rotating platform.
You don't have to use any special abilities to access the rotating platform. You can use the robo-tractor that's positioned right under it, and all you need to do is to take a few jumps to get to the platform.


