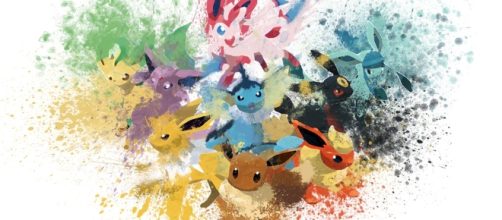
School is just about out, which means a lot of parents will be trying to keep up with their kids – especially the younger ones. One of the best things to both slow your kids to a manageable speed and allow them to keep working on those critical thinking skills – according to the book "Art for Art’s Sake?" published by the Centre for Educational Research and Innovation, arts education can be incredibly helpful not only in “foundational skills” used in all core classes, but also “skills required by…our economies” (Winner 1) - is art!
So, if art is so good, then maybe it would be best to keep it going through the summer – especially since art keeps kids entertained in a positive way.
Get creative with watercolors
For this project, you will need:
- A piece of paper (any size will do, and although printer paper is sufficient, thicker stock will prevent wrinkling)
- Assorted brushes
- A straw
- A bowl or cup of water
- Toothpicks
- Watercolor paints
- Masking tape (optional)
- Newspaper (optional)
First, if you’re working in a delicate area, or your watercolor paints aren’t washable, you’ll want to cover your area with a layer of newspaper. There’s going to be a good bit of splattering, so be sure to give the work area a wide berth. The newspaper can be taped down, if you want, with the masking tape, or you can leave it loose.
Now, go ahead and set up the paper that you (or your child) are using – if you want to tape it down, you can roll some masking tape into loops and put it on the bottom of the paper, lay it across the corners, or fully layer the edges.
It should be noted, however, that although masking tape will not peel thicker paper such as Manila or the thicker stocks found in sketchbooks, it can peel through printer paper, especially when wet, so be careful! This is also the time to set up the water and brushes, and get everything else out and ready! Make sure anyone involved is wearing something they can get your Watercolors on.
Finally, it’s time to start your art! Make sure that your watercolors are properly mixed when they’re being used, but let your child have fun. There are a few strokes and tips to try with your child – or yourself – and these can be done in any order. The spirit of art is creativity, and that comes with experimentation.
Method one: the Classic
This is fairly simple, as it’s the paint-brush-canvas style we all know. Since this is Abstract art, the strokes can be any shape without changing the subject! Try different pressures, different amounts of paint, and different width of brushes.
Method two: Brush Splatter
You’ll want your paint at the same thickness as method one to start, but this can be done with slightly thicker to much thinner paints. Take the brush, and put a little bit of your paint just on the tip. Then, raise the brush, and flick the paint off of it onto the paper. It might take a few tries, but the motion is very much like a fishing cast, although your follow-through will take you a good bit lower.
Remember that wide splatter zone? This is a good amount of where it’s coming from.
Method three: Straw Splatter
If you find that there’s a little bit too much paint going just a bit too far, use the straw splatter! Poke the paint with one end, then tilt the straw onto its side and roll it around in the paint. The same motion works here too, but the straw doesn’t hold as much. This has a little less control, though, and risks chunks of solid paint if the straw digs into the paint too much.
Method four: Water Mixer
Now you’ve got your most basic strokes, so it’s time to vary things up a little! Either start on a blank spot on the paper, or on wet paint. Take the straw, dip the paint-covered end into the water, and then cover the other end firmly with the pad of your finger.
Quickly transfer the water to where you want it to go, and let the water go. Ta-da! A DIY eyedropper! If this gives you too much water, use a toothpick to transfer the water a drop at a time. If you’re going to wet paint, this will let the color(s) blend into the water. If this is on dry paper, this is when you add paint – either the same way you added water or with one of the other methods – to let it blend.
Method five: the High Wind
Finally, take your straw, making sure not to put the dirty end anywhere in or near your mouth and face, and blow on the wet droplets of paint. This creates fun, super-thin lines with their own tiny droplets at the end!
Any of these techniques can be played with to change the effects slightly, and the results are gorgeous custom-made abstract art! Make sure your child is safe, and let them have fun!


